Shopify
By syncing your customer and order data from Shopify, you’ll unlock advanced audience-building capabilities in Untitled.
Source Overview
Shopify is a leading ecommerce platform that powers millions of online stores. By connecting Shopify as a source in Untitled, you can unlock powerful use cases—such as customer enrichment, segmentation, and lookalike modeling—by ingesting historical order and customer data.
This guide will walk you through how to configure Shopify as a data source within Untitled and begin syncing customer and order data for downstream activation, enrichment, and analysis.
Ready to connect your Shopify account to Untitled? Follow our setup guide below! If you encounter any issues or would like our team to complete this connection on your behalf, please reach out to [email protected].
The following connection process takes approximately 5-7 minutes once the prerequisites are met.
Prerequisites
Admin Access to a Shopify shop
A "Shop Name"
You can find your shop name immediately before {THIS IS YOUR SHOP NAME}.myshopify.com in your Shopify URL. For example, if your URL is acme.myshopify.com, then your shop name is acme.
Walkthrough Video
Connection Setup Steps with Screenshots
Setup Instructions
Log into Untitled
First, log into your Untitled account
Select
Sourcesin the left navigation menu > ClickConnect a sourceClick
Connecton the Shopify source card

A popup modal will open prompting you to name the source connection. Choose something descriptive like [my-shop name] Untitled Source

Click
Confirmwhich will then open a new tab in your browser to begin the authentication process.
Note: if the link does not automatically open a new tab, feel free to manually open a new tab and copy and paste the link in the url search box of your preferred browser.

You'll be brought to a connection page that looks like the following image. Please press
Continueon this page.

At the following screen, click
Continue Setup with Shopify.
Instructions from Fivetran are located on this page, however, these are for a Legacy Connection method. Please disregard their instructions and move to the next step using this Untitled knowledge base article as your guide.

You'll be redirected to the Shopify App store if you're not yet logged in to your Shopify Store. Please press
Installon the Fivetran Shopify App overview page. (If you're already logged in, you may be prompted to re-login to install, or the button will sayLogin to Install).

Login to your Shopify Store

From the logged in view of the Shopify App Store, Select the store you want to sync data from.
We recommend that you create only one connection for each Shopify store in the event you have multiple.
Depending on whether or not the Untitled Fivetran application is already installed in your Shopify account, do one of the following:
If the app is NOT installed, click
Install.If the app is already installed, click
Update.
Once you have finished, you will be redirected back to the Untitled Fivetran setup page, and the Shop name will be automatically populated.
In the "Historical sync time frame" drop-down menu, Select “Sync all historical data”
This ensures all available historical records from your source are included. This step is critical to enable features like our Shopify enrichment, which allows you to build exclusion audiences based on existing Shopify records, and our ICP AI model, which analyzes your historical customer data to automatically identify high-quality lookalike targets.
Click
Authorizeto allow Fivetran to access your Shopify account using OAuth.Click
Save & Test
Fivetran will take it from here and sync your data from your Shopify account to the Untitled Platform! Please allow 3-5 minutes for all checks to clear and for the authentication to fully complete. Upon successfully connecting your Shopify Store, you'll see it populated in your "Connected Sources" tab with a green indicator status icon like the image below.

Please allow for 3-4 hours for all historical data to be synced. At which point, you can proceed with shopify enrichment-driven audience building filters for options like include/exclude Shopify matches.
LEGACY Connection Setup
LEGACY Connection Prerequisites
To connect your Shopify account to Untitled, you will need:
Access to your Shopify account
Your Shopify shop name
The Shop name is located in the URL of your Shopify account -- after the https:// and before .myshopify
To Enable custom app development
Prior to following the setup instructions below, you will need to enable custom app development in your Shopify account. Only a Shopify store owner or a staff member with the Enable app development permission can make this update.
Steps to Enable Custom App Development:
From your Shopify admin, click Settings > Apps and sales channels.
Click Develop apps.
Click Allow custom app development.
IMPORTANT: Only use an HTTPS URL with TLS version 1.2 or above.
LEGACY Setup Instructions
Once the prerequisites outlined above are complete, proceed with the following step by step instructions.
Part A—Log into Untitled
First, log into your Untitled account
Select Sources in the left navigation menu.
To view the sources available for integration, select the tab labeled Connect a source
Search Shopify and click Connect
Select Open - you will be redirected to a new window
Keep this window open, create a new tab or window, and go to Shopify
Part B—Log into Shopify
Log in to your Shopify account.
Navigate to the settings menu at the bottom left.
Then select Apps and sales channels
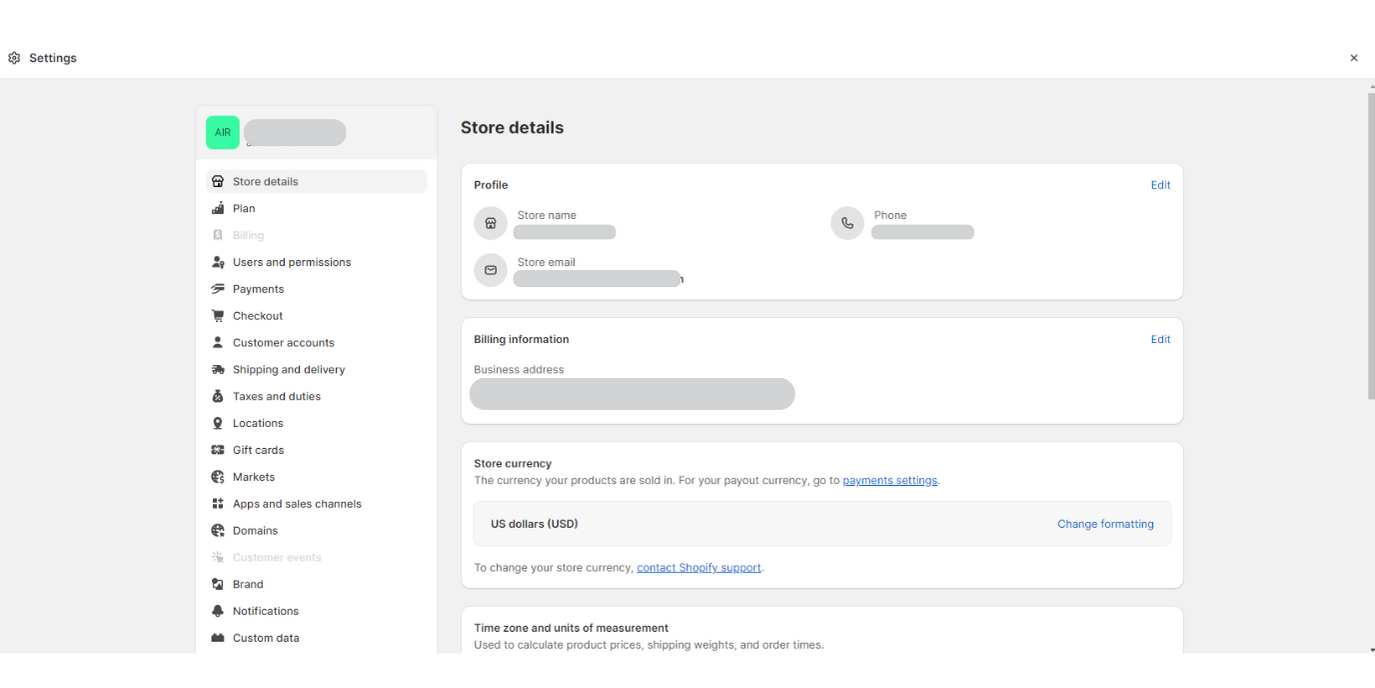
Part C—Create an App in Shopify
Click Develop apps.
Click Create an app.
Enter an App name. This can be any name you choose, we suggest an easy identifier such as “Untitled Fivetran.”
In the App developer drop-down menu, select the Shopify user email you would like to associate with this action.
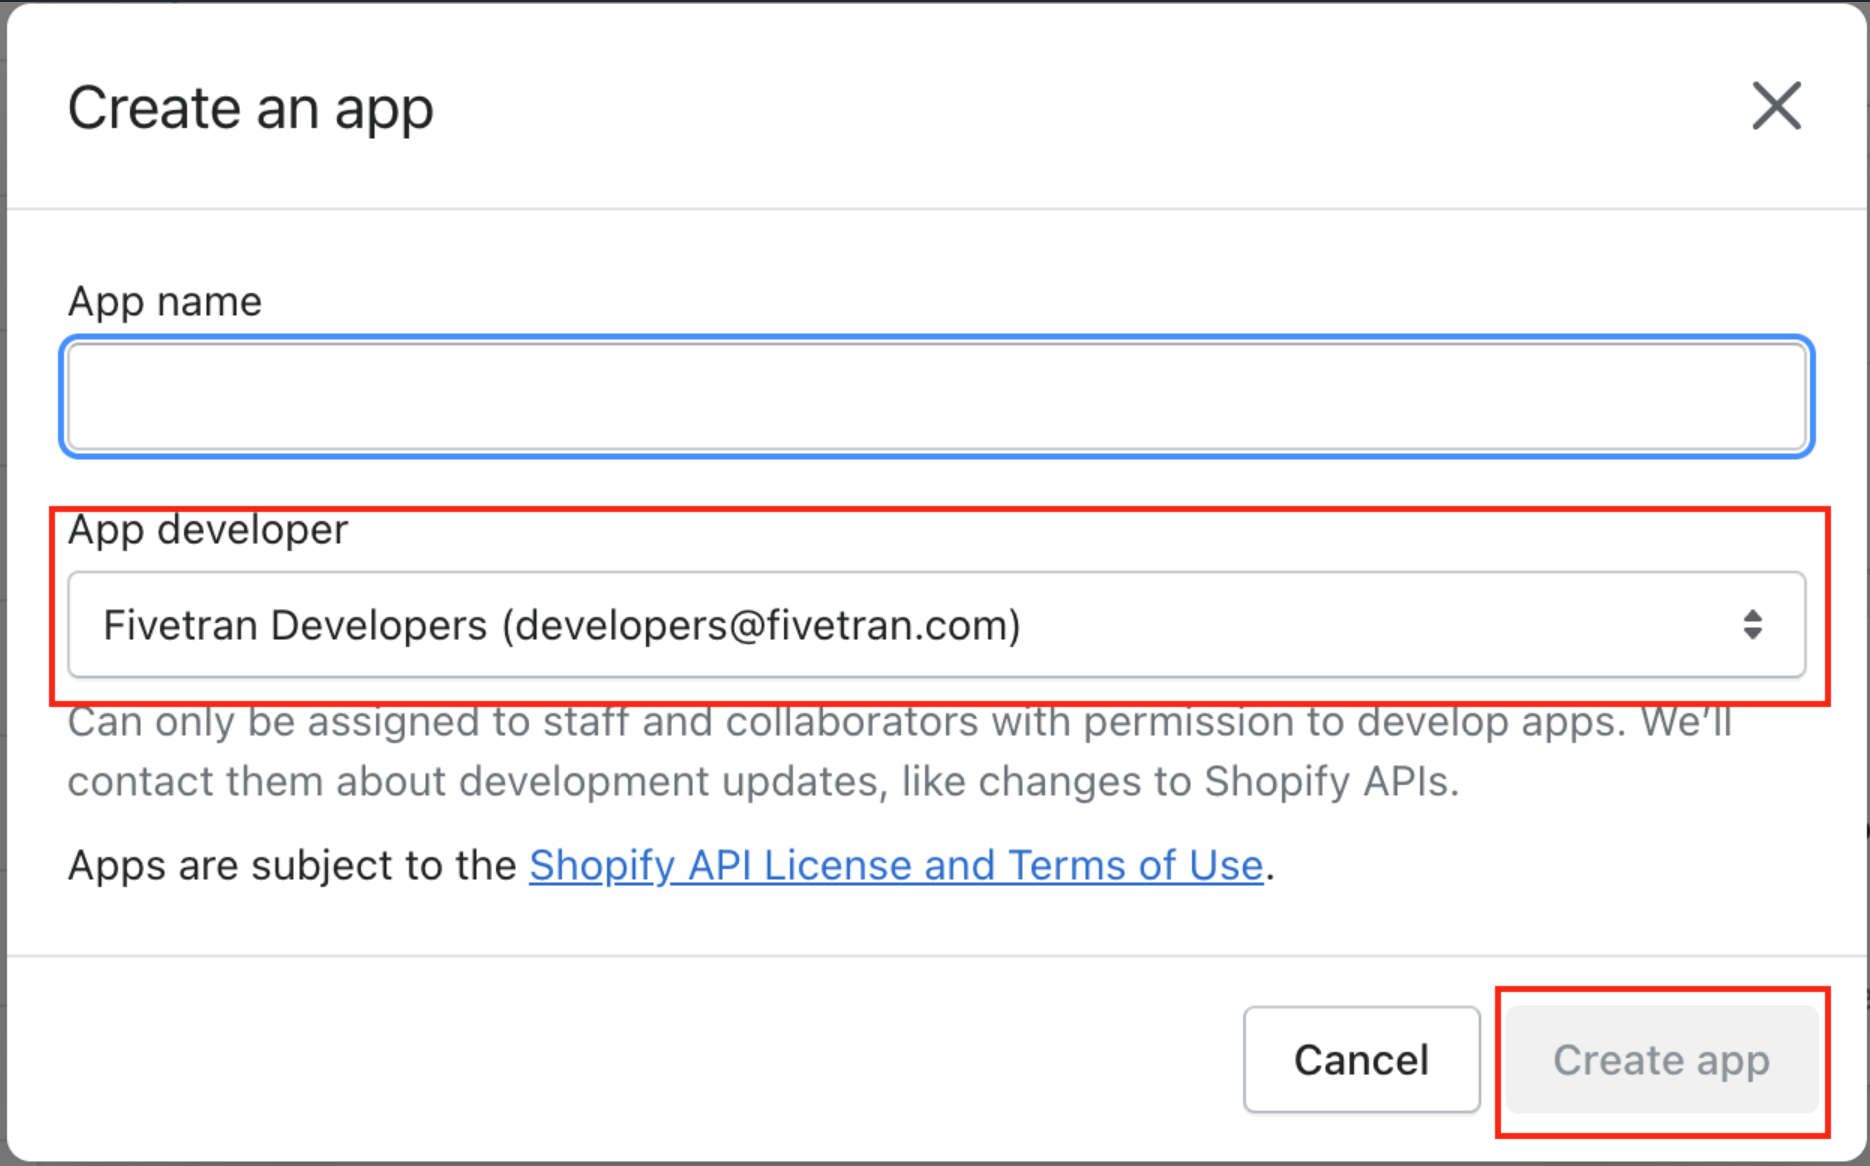
Click Create app.
Part D—Select API Scopes
Under Overview, click Configure Admin API Scopes.
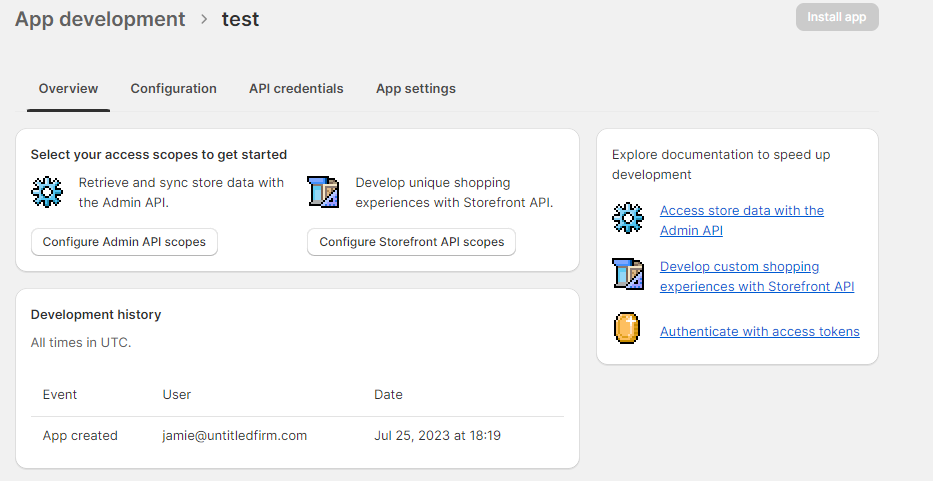
Here, you will need to check the box for each of the below Admin API scopes. Once completed, click Save in the upper right hand corner.
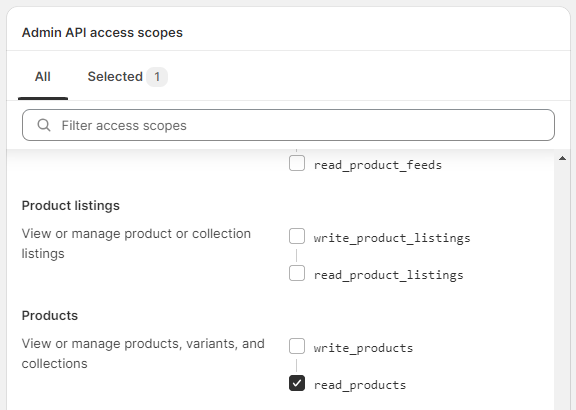
read_products
read_customers
read_orders
read_price_rules
read_fulfillments
read_shipping
read_draft_orders
read_inventory
read_shopify_payments_payouts
read_shopify_payments_disputes
read_content
read_themes
read_product_listings
read_customers
read_locations
read_script_tags
read_assigned_fulfillment_orders
read_merchant_managed_fulfillment_orders
read_third_party_fulfillment_orders
read_analytics
read_reports
read_discounts
read_marketing_events
read_resource_feedbacks
read_translations
read_locales
Then select Install App right above the Save button.
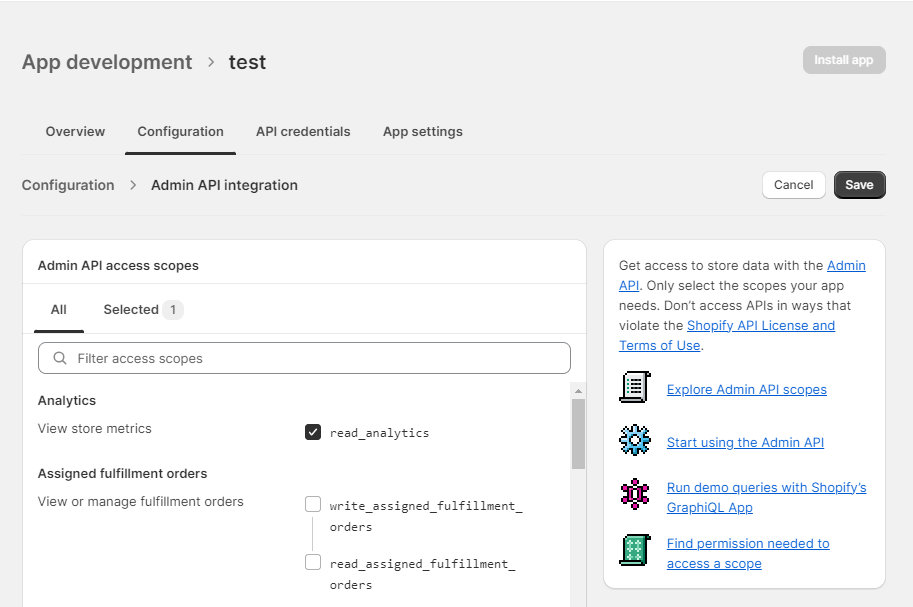
Next, select the API credentials tab, and copy the Admin API access token.
Part E—Finish connection
Go back to the Untitled window requesting the Shop name and Access token
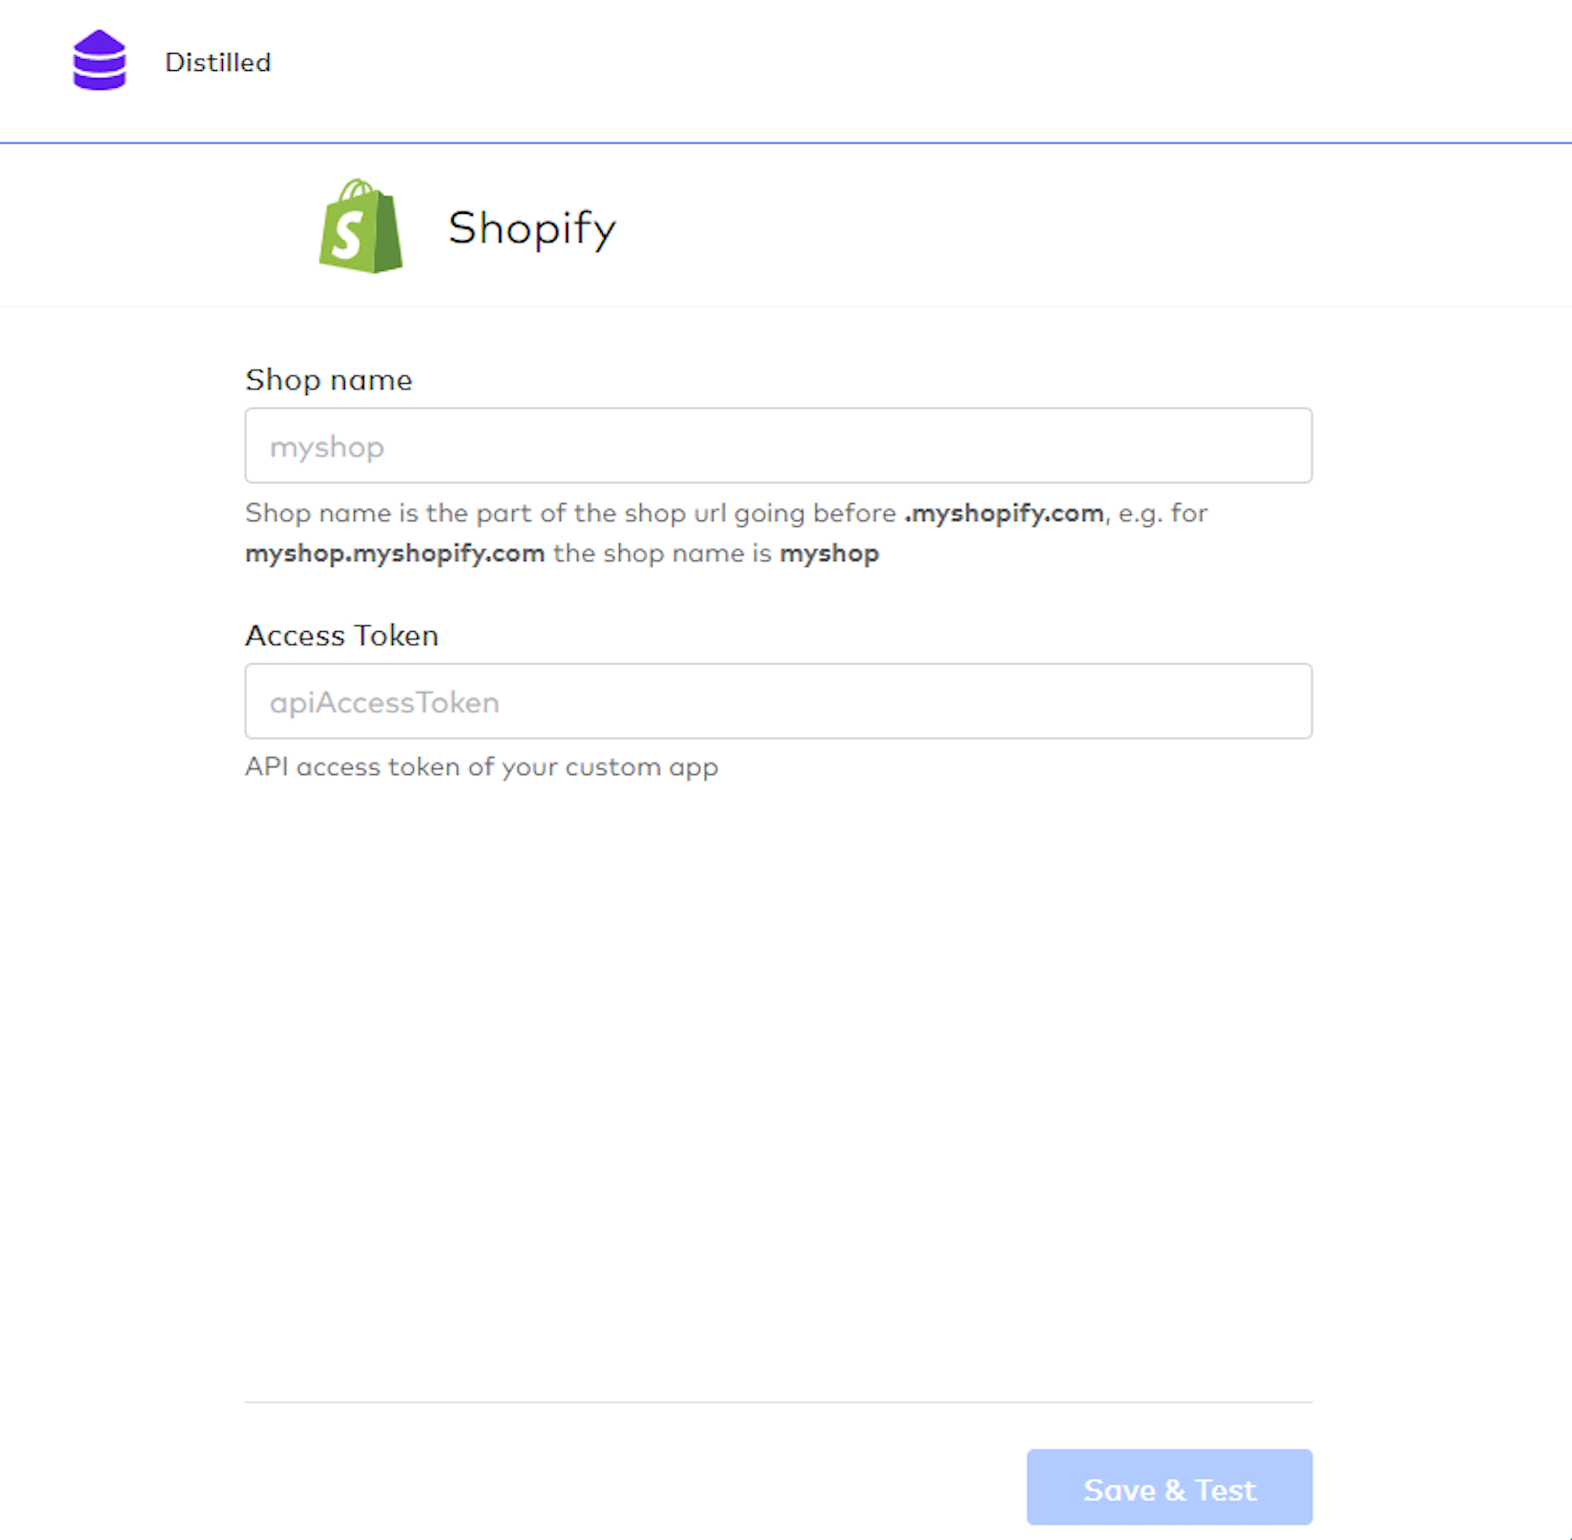
Enter your Shop name.
You can find your shop name immediately before {THIS IS YOUR SHOP NAME}.myshopify.com in your Shopify URL. For example, if your URL is acme.myshopify.com, then your shop name is acme.
Enter the Admin API access token you copied from Shopify
Click Save & Test.
You can now safely close this window.
Need Further Support or Have Additional Questions?
Check out our FAQs to get some answers, start a chat on our website, or get connected directly with our team here.
Last updated
Was this helpful?